Welcome,
Apple Cider Vinegar, Ice and Coconut Oil are 3 ingredients I use personally and during patient care in the home for several reasons. Sit back and Discover 5 Reasons You Should Take Advantage of the Many Benefits of Ice, How to Use Coconut Oil and The Natural Healing Qualities of Apple Cider Vinegar.
Who said you have to spend a lot of money to look younger, cure skin problems, reduce pain instantly, heal wounds or even improve overall health . Most likely, you already have 3 very inexpensive remedies in your kitchen right now!
BRAGG APPLE CIDER VINEGAR BENEFITS


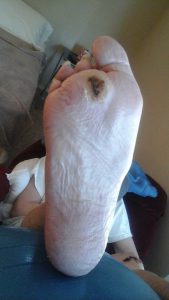
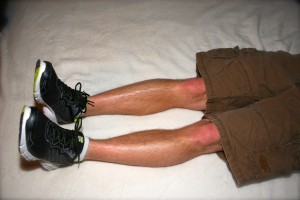
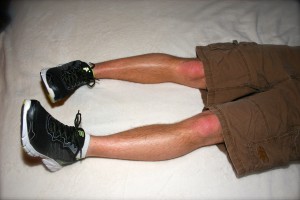
There are literally hundreds of benefits to using ACV. From curing warts, sore throats, toenail fungus, wounds, and moles to improving the health of your hair. ACV is an inexpensive and very effective MIRACLE solution. These are pictures of one of my patients that treated his foot with ACV and EPSOM salt soaks once a day for about 1 week.
Foot Wound Before ACV Treatment
|
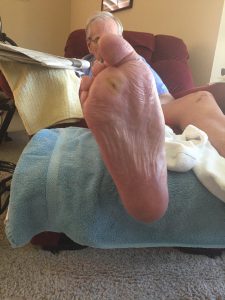
Foot Wound AFTER ACV Treatment
|
|
|
Have plantar’s warts? No problem. Soak a piece of a cotton ball in ACV, put it over the wart, secure it with a bandaid, and do this until the wart turns black and eventually falls apart. Generally, my daughter has to do this for 5-7 days, but the good news…the wart does not come back, there is no SPREADING or making of additional warts, AND it does not cost me $75-100 for a dermatologist to “Freeze the wart off.” Win, Win, Win in my book.
What about sinus congestion, sore throats, or that “I feel like I am coming down with something?” Yep, I treat it all with a “SHOT” of ACV. I have literally saved hundreds of dollars in trips to the “Doc-In-The-Box” clinics because when my family or I get the first signs of not feeling well, a shot (1-2 Tablespoons) of ACV for about 3 days and Ta Dah…the symptoms go away!
Ok so maybe you want to look younger, have shinier hair, whiter teeth, manage sunspots (dark pigmentation on the skin from the sun), tone the skin’s surface, or get rid of moles. I have done all of these using ACV. Literally, Apple Cider Vinegar has been an ALL NATURAL, CHEAP, and VERY VERSATILE cure for me, my family and patients for YEARS.
Natural Sunspot, Skin Toner Secret: Apply ACV directly on the face at night (keep your eyes closed until the ACV dries and DO NOT rub ACV near the eyes or in the EYES) by soaking a cotton ball in ACV.
Whiter Teeth: Use ACV as a mouth wash (swish/gargle about 2 TBSP ACV) and spit it out- I only do this once a week!
Wart Removal: Use a STERILE straight pin and pierce the mole about 4 times (moles do not have nerve/pain receptors so this should not hurt and you ONLY are penetrating the surface of the mole–DO NOT make it bleed) on the surface. Soak a piece of a cotton ball in ACV and place the cotton ball over the mole. Secure with a bandaid. Repeat every day until the mole disappears. My mole disappeared in 7 days.
Healthier/Shinier Hair: 1 tsp Vegetable Glycerin (I get this at Walmart), 2 TBSP ACV, 2 TBSP Castor Oil (I get this at Walmart), 1 Egg, and 1 TBSP Warm Honey. Mix it all together. Apply directly all over the hair. Wrap hair in Saran Wrap and leave on for 1-2 hours. Wash hair with SHAMPOO only. I do this twice a week for a month.
Go on PINTEREST and search uses of ACV and you will be AMAZED!!! I only mentioned what I have PERSONALLY been successful with using ACV for, but I have never been let down by its healing, cleansing, and inexpensive solutions. I love, love, love ACV, and I know you will too.
If you have any questions about my personal recipes I have used to treat toenail fungus, improve the health of my hair and skin, or you have a personal story to tell me about ACV, PLEASE leave me a comment. I believe knowledge is powerful and experience combined with knowledge can be MIRACULOUS.
ICE, ICE BABY
You have been told all your life, use ICE on that injury! Do you know why you should use ICE versus HEAT on a recent injury?
Without delving really far back into chemistry class, think about what happens when something gets cold versus hot. Cold temperatures SLOW down and SHRINK things. I know when I am cold I want to curl up under a blanket (get as small as I can and cover up as much of my body as I can). Snakes move slower, concrete shrinks and cold syrup pours slower than hot syrup.
In the same manner, when ice is applied to the skin the skin cells get smaller and circulation of fluid (blood, swelling fluids, etc…) slows down, and the blood vessels in the skin/tissue shrink down as well . Consequently, swelling, pain, and bleeding under the skin (bruising) is decreased when ice is applied rather than heat. Heat does the exact opposite–dilates (expands) cells/blood vessels and speeds up circulation–and when applied to a new wound, an already swollen and/or bruised area, it makes the bleeding, swelling, and pain worse.
Need pinpoint pain relief fast? Use an ice massage!
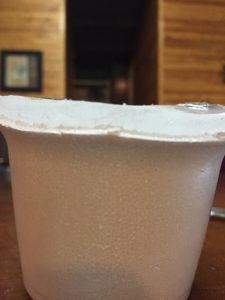
Styrofoam Cup of ICE
Take an ice cube or better yet, freeze water in either a paper or styrofoam cup (Sonic cup work great). If you use a cup with water frozen inside, tear the edge of the cup down (hence the reason for using paper or styrofoam) to expose about 1/2 inch of ice (See Above picture). Place a towel under the area you are going to massage with the ice to catch the melted water. Using either the ice cube or the cup of frozen water, apply the ice in circular movements over the area that is painful, swollen, and/or bruised.
NOTE: the skin will go through the following sensations before it goes numb: feels cold, burns, and then goes numb! Stick with the ice massage until the area goes numb–this is the desired pinpoint pain relief–and the skin will be red.
TIP: When doing a massage with or without ice, always massage the area to promote drainage. In other words, start at the area where the bruise/swelling is the furthest from the heart and massage TOWARD the direction of the heart!
LADIES — Want to decrease fine lines, acne, and/or smooth out your foundation—THAT’S RIGHT USE ICE!!!
Every morning before I apply my makeup I do 2 things. First, I wash my face with a sugar scrub to clean the pores, remove dead skin cells, and even thin out those irritating fine hairs. What do I use for a sugar scrub? Simple, I use my regular liquid body wash and just add 2 Tablespoons of sugar. It’s that simple!
Second, I take 2 ice cubes and rub them all over my face until both are melted. I concentrate on the T-zone area, around my eyes and mouth. Remember, ice “shrinks cells” so by massaging my face with ice BEFORE I put on makeup I make my pores smaller which closes my pores so makeup does not clog up the pores causing acne and my makeup goes on smoother!
 WHAT IS THE HEALTH BENEFITS OF COCONUT OIL
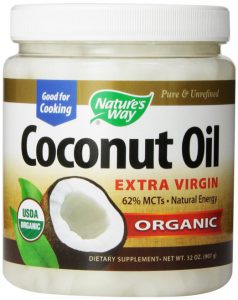
Another tool in my arsenal is coconut oil for moisturized skin, healthier hair, and for massaging purposes on my patients when I do swelling control massages.
Coconut oil absorbs into the skin with little to no residue on clothes/linens. It instantly moisturizes the skin and hair better and cheaper than ANYTHING else I have tried (Meaningful Beauty, Avon, Sheer Cover, Beauty Control, Mary Kay). Dry, fragile, cracking, and itchy skin is instantly infused with moisture providing relief and decreasing the risk of additional skin problems associated with scratching. I massage my patients’ skin with coconut oil because it is quickly absorbed into the skin and does not leave an oily residue on the linens. I highly recommend coconut oil for softer, healthier, and moisture-rich skin and hair. Here are my personal recipes:
Hair Care: I apply Coconut Oil all over my hair when it is dry. Then I braid and bun my hair with the oil in it. I sleep in the coconut oil and wash my hair with both shampoo/conditioner the next morning. I do this once a month–usually the 2nd week of the month because I use my ACV recipe as well.
Furthermore, I personally use and my patients have successfully used Coconut Oil to:
1) heal/manage surgical scars after the steri-strips are removed from the surgical incision
2) heal skin abrasions
3) manage bruises
4) resolve eczema, psoriasis, dry/cracking skin
Coconut oil is CHEAP and has worked better & faster on me and my patients compared to medicated ointments and lotions.
Did you know Coconut oil has been featured on the “Dr. Oz” and “The Doctors” to treat Diabetes? Coconut oil is natural and can be used in Diabetic shakes, coffee, and other HEALTHY recipes. I highly recommend PINTEREST.com for recipes, but my husband was PRE-DIABETIC and has successfully controlled his blood sugars with these recipes. You are welcome to try one of my personal recipes below. In the same manner, if you have a recipe or have used coconut oil and would like to share your experience, please leave me a comment.
Pina Colada Shake
1/2 cup Coconut Milk (Unsweetened)
1/2 cup Coconut Water
1 Tablespoon liquid coconut oil
1/2 cup Frozen Pineapple
1/2 scoop Whey Vanilla Protein Powder
1 Teaspoon Green Tea Powder
1/2 Teaspoon Organic Honey
6 cubes of ice
Place all ingredients in a Blender (I use my Ninja Auto IQ Blender)
Mango Maniac Shake
1 cup Almond Milk (Unsweetened)
1 Teaspoon Green Tea Powder
1/2 cup Frozen Mango
1 Tablespoon Coconut Liquid Oil
1/2 of a lime squeezed for juice
1/2 Tablespoon Organic Honey
6 cubes of ice
Place all ingredients in a Blender (I use my Ninja Auto IQ Blender)
Obviously, Apple Cider Vinegar, ICE, and Coconut Oil are 3 FANTASTIC KITCHEN ingredients that I literally use or have used for several years. I love learning natural remedies and would love to hear about some of your experiences or answer any questions about apple cider vinegar, ice and coconut oil. Please leave a comment and share your thoughts or ideas.
Until we connect again, Be Safe and Healthy,
Shawna PT, MPT

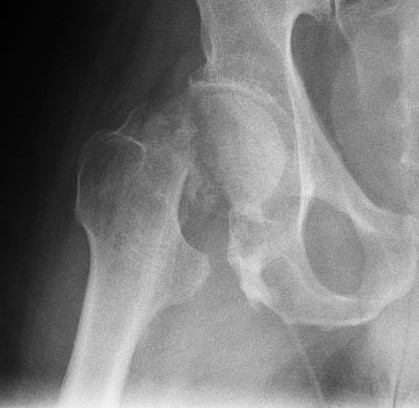
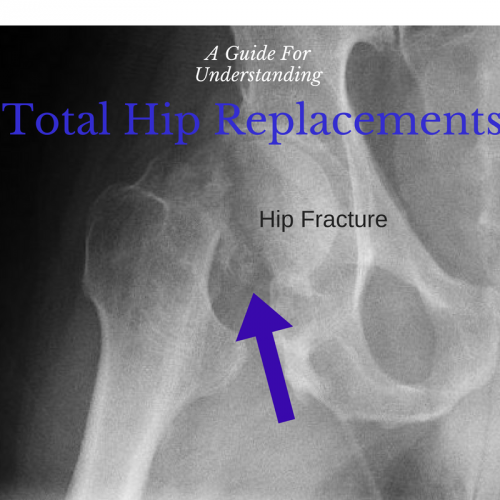 One of the most dreaded diagnoses associated with elderly falls is a subsequent hip fracture. Fractures involving the hip joint and/or the femur (leg bone above the knee) can either require a TOTAL HIP REPLACEMENT (THR)–aka TOTAL HIP ARTHROPLASTY (THA)–or an OPEN REDUCTION INTERNAL FIXATION (ORIF) surgery. Hip fractures requiring total replacement of the hip joint generally require rehabilitation and special precautions. This page will provide general facts/tips, basic Physical Therapy Exercises, and an overview of the precautions associated with a Total Hip Replacement.


 Improved posture
 Improved Balance
 Improved Strength
 Improved Coordination
 Decreased Effort/Reps without Sacrificing Results
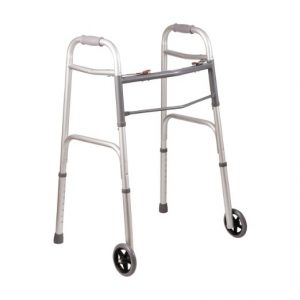 There are several very common walking aids used to help with balance problems, pain, and/or an inability to tolerate bearing weight on a leg due to an injury, surgical procedure, or decline in health (stroke, Parkinson’s Disease, etc…). Rolling walkers are one of the many assistive devices commonly used in a variety of settings (home, hospital, inpatient rehab) to decrease the effort and fall risk during walking and standing activities.